Adding keyboard navigation to Angular lists using Angular CDK ListKeyManager
Programming is fun. Especially when you love the technology you’re working on. We at Modus Create love the web and web technologies. One of…

Programming is fun. Especially when you love the technology you’re working on. We at Modus Create love the web and web technologies. One of the frameworks that we work on is Angular. And when you work with Angular on large scale apps, there comes a set of different challenges and problems that require diving deep into Angular. In this article, we’ll go through one of such challenges that we experienced and will implement keyboard navigation to a list component. One of the potential implementations are autocomplete dropdown lists which may have keyboard navigations.
To implement keyboard navigation, we could use our custom implementation but that would take much time and perhaps would be re-inventing the wheel if something is already out there that does the job. Luckily, Angular Material already has a CDK (Component Dev Kit) which provides a lot of cool components and services for creating custom components & services that we can ship as libraries or use in our applications. The good part is that Angular Material itself is built on top of the Angular CDK.
Angular material’s a11y package provides us a number of services to improve accessibility. One of those services is the ListKeyManager service. Which we will be using to implement keyboard navigation into our app.
Let’s dive into the code:

First, if you don’t have @angular/cdk package installed in your app, do a quick npm install @angular/cdk --save.
We already have an app created here which you can clone/fork and work locally on it. We’ll keep things simple for now but there can be more complex use cases when using ListKeyManager. We’ll show you how we’ve implemented keyboard navigation in our demo app and you can implement this in a similar way.
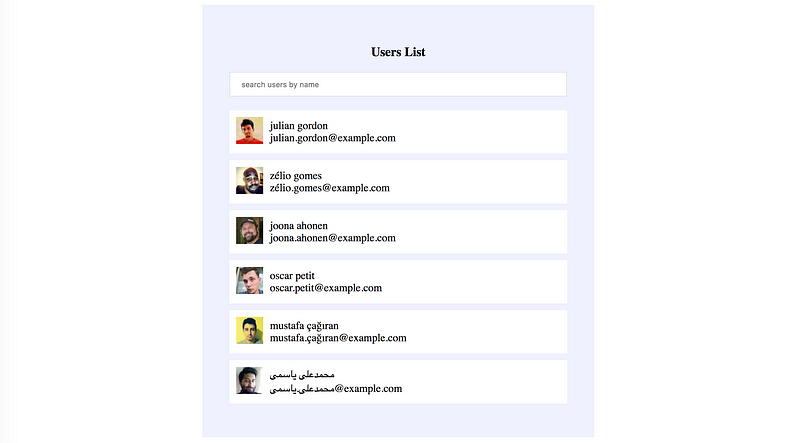
Let’s go through what our demo app looks like. First off, we’re loading some random users from randomuser.me api. We load them in our app.component.ts and then we use our ListItemComponent to display each user individually. We also have a search input which will filter the users based on their names.
See the code below for AppComponent:
In our view (app.component.html), we have:
Notice that we’re looping over users using *ngFor and passing each user as an item in the app-list-item component. We’re also filtering the list using the filterByName pipe which uses the value from the input above.
The app-list-item just displays the image, name and email of each user. Here is how the view code looks like:
Notice that the div with the class item has a conditional class being applied i.e. item--active. This would make sure that the active item looks different from the rest since we’re applying different styles on this class. The class item--active would be applied when the isActive property of the item is true. We will use this later.
Moving forward, we’ll now include ListKeyManager from the @angular/cdk/a11y package in our app.component.ts as:import { ListKeyManager } from '@angular/cdk/a11y';
Then, we have to create a KeyEventsManager instance in our app.component.ts that we would use to subscribe to keyboard events. We will do it by creating a property in the AppComponent class as:export class AppComponent implements OnInit {
users: any;
isLoadingUsers: boolean;
keyboardEventsManager: ListKeyManager<any>; // <- add this
constructor(private usersService: UsersService) {
}
...
}
We have just declared our property keyboardEventsManager but haven’t initialized it with anything. To do that, we would have to pass a QueryList to ListKeyManager constructor as it expects a QueryList as an argument. The question is, what would this QueryList be? The QueryList should comprise of the elements on which the navigation would be applied. I.e. the ListItem components. So we will first use @ViewChildren to create a QueryList and access the ListItem components which are in AppComponent‘s view. Then we will pass that QueryList to the ListKeyManager. Our AppComponent should look like this now:
Now that we have created the keyboardEventsManager , we can initiate the keyboard events handler using a method named handleKeyDown on the search input as we would press Up and Down arrow keys and navigate through the list observing the active item.
We will connect the handleKeydown method to the searchinput in app.component.html on the (keyup) event as:<input type="text" [(ngModel)]="searchQuery" placeholder="search users by name" (keyup)="handleKeydown($event)">
If you debug the functions now, they would be triggered when up/down or enter key is pressed. But this doesn’t do anything right now. The reason is that as we discussed, the active item is distinguished when the isActive property inside the ListItemComponent is true and the item--active class is therefore, applied. To do that, we will keep track of the active item in the KeyboardEventsManager by subscribing to keyboardEventsManager.change. We will get the active index of the current item in navigation each time the active item changes. We just have to set the isActive of our ListItemComponent to reflect those changes in view. To do that, we will create a method initKeyManagerHandlers and will call it right after we initialize the keyboardEventsManager.
Let’s see how our app looks like now:

BOOM💥! Our list now has keyboard navigation enabled and works on the UP and DOWN arrow keys. The only thing remaining is to show the selected item on ENTER key press.
Notice that in our app.component.html, the app-list-item has an @Output emitter as:(itemSelected)="showUserInfo($event)"
This is how the ListItemComponent looks like:
If you recall, in our handleKeydown method inside AppComponent, we execute the below statement on ENTER key press:this.keyboardEventsManager.activeItem.selectItem();
The above statement is calling ListItemComponent‘s selectItem method which emits itemSelected to the parent component. The emitted event in the parent calls the showUserInfo($event) which finally alerts the message with the user name.
Let’s see how the completed app looks now:
Conclusion
Angular CDK provides a lot of tools and as we’re working on complex projects, we’re continuously exploring them finding out great ways to create our own custom complex components and behaviours. If you’re interested in building your own component libraries like Angular Material, do dive into Angular CDK and paste in the comments whatever cool stuff you come up with.
Happy Coding!